.svg)
.svg)
.svg)




How to Fix a Water Damaged Laptop: Expert Tips
You spill water on a laptop in the middle of a workday, and for a split second you hope the screen will just recover on its own. Then the fan stops, the keyboard goes dead, or the machine keeps running while you're staring at a wet palm rest and wondering whether you've already lost the data, the hardware, or both.
Bluntly put, with a water-damaged laptop, the first move decides more than the cleanup does, because power and liquid are a bad combination. The right response is to cut power fast, stop testing it, and assume the board may already be at risk even if the outside looks fine.
Table of Contents
- Why the First 60 Seconds Determine Your Laptop's Fate
- Immediate Power Isolation and Liquid Drainage Steps
- Safe Drying Methods and Recommended Timeframes
- Hidden Corrosion Damage That Strikes After Drying
- Data Recovery Options and Realistic Repair Expectations
- When to Call a Professional and What to Expect
Why the First 60 Seconds Determine Your Laptop's Fate
A drink spills across a laptop, and the mistake usually happens right after. The screen is still lit, the fan may still be spinning, and someone reaches for the keyboard to see whether it “still works.” That pause gives the liquid time to wick under the keys, into the trackpad area, and down toward the board where damage starts.

Why powered circuits fail fast
Liquid does not have to pool to do harm. The moment it reaches a powered circuit, it can bridge contacts and create short paths, and those paths keep chewing through components as long as current is flowing. That is why spill-response guidance starts with the same move every time, kill the power, unplug the charger, remove a removable battery if the design allows it, and stop treating a quick test boot like harmless curiosity [Aeanet repair guide].
Practical rule: if the laptop is still on after the spill, every extra second increases the chance of a board-level failure.
The temptation is obvious. A laptop that still lights up looks recoverable, so people try one more restart or one more check. In my repair bench work, that is often the moment moisture gets driven deeper under the keyboard, under shielding, or into layered assemblies that do not dry from the outside at all. Hidden corrosion starts there, and it keeps spreading after the shell looks dry.
What “fate” really means here
The first minute is not about proving the machine is fine. It is about deciding whether the spill stays local or turns into motherboard damage, keyboard failure, or both. The sooner power is cut, the better the odds that cleaning will be enough and that you will not be pricing a full board replacement later, especially on tightly packed modern laptops with integrated batteries and little room for liquid to escape. For more repair-oriented guidance, see the water-damaged laptop repair notes.
That is the part people miss. The laptop can appear dry and still be actively failing inside. Cut the power, drain what you can, and assume the damage is already working below the surface.
Immediate Power Isolation and Liquid Drainage Steps
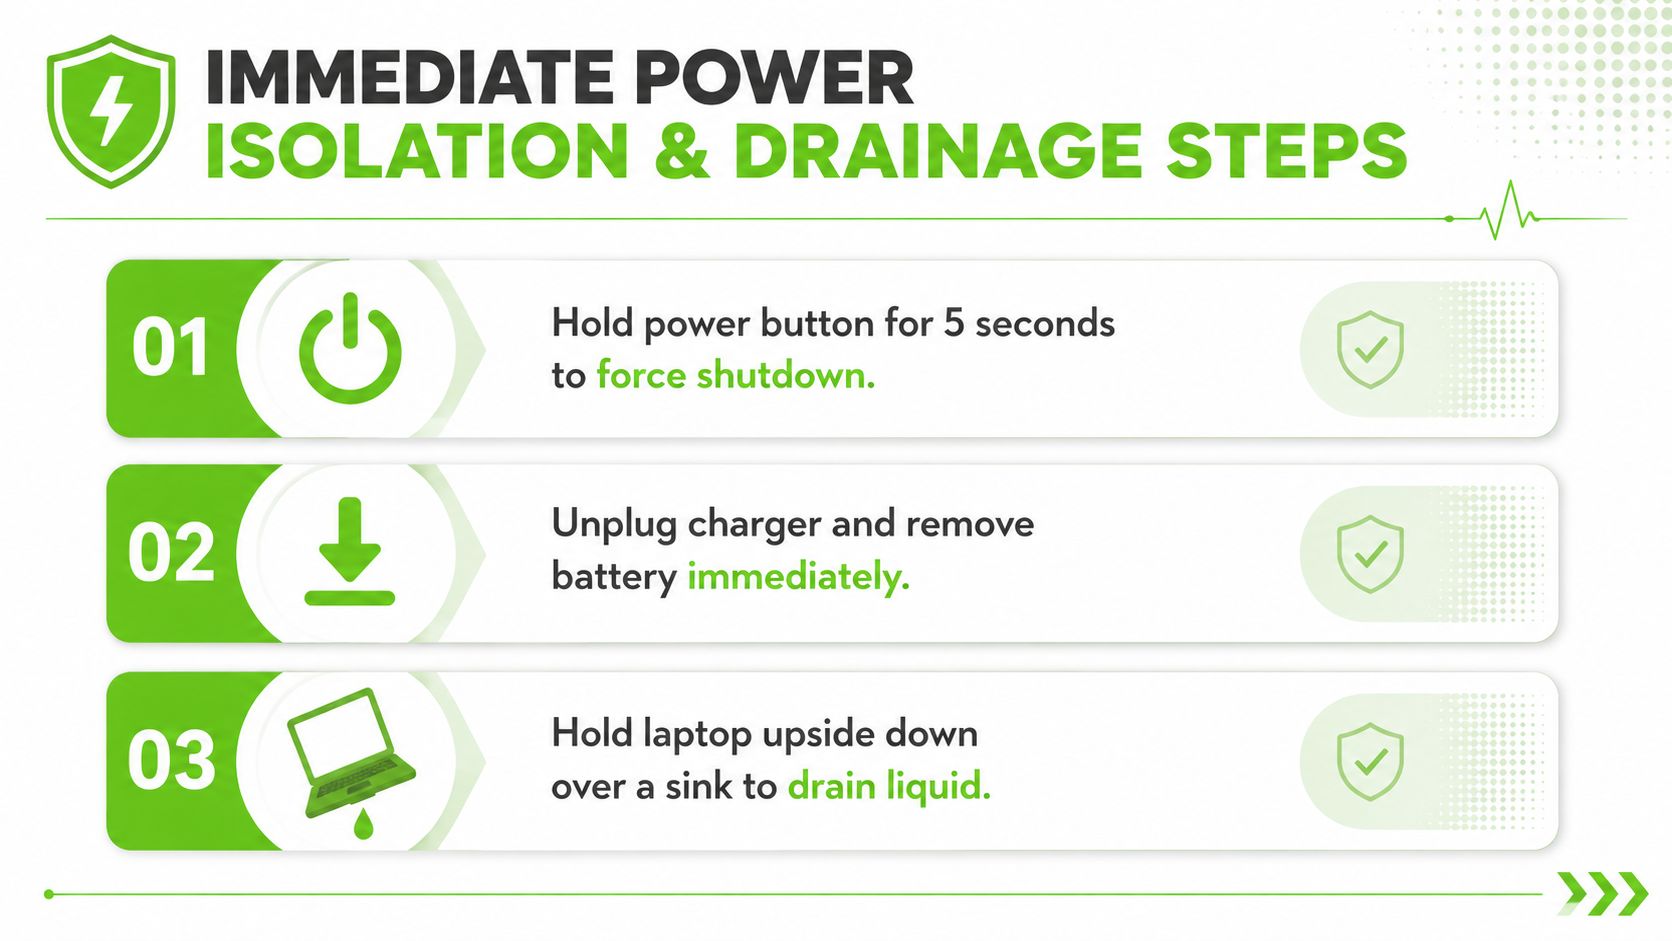
The first minute after a spill should be treated like a bench job, not a guess. Hold the power button down to force shutdown, unplug the charger, disconnect any USB devices, SD cards, or dongles, and remove a removable battery if the design allows it.
If the laptop is still awake, do not wait for a graceful shutdown. Cut the power and clear the connections immediately. A live board can keep spreading moisture into failure paths, especially when liquid bridges tiny contacts on the motherboard or keyboard assembly. That is how a small spill becomes hidden corrosion later, even if the shell looks fine from the outside.
Remove power first, clean later. Testing first is how a spill becomes a board failure.
After that, put the laptop upside down or on its side so gravity can help drain liquid away from the keyboard and board stack. A towel can catch runoff, but the goal is drainage, not just soaking the outside. If you can open the chassis safely, do it carefully and only as far as the design permits, because on many newer machines the battery, shields, and glued parts make deeper access more complicated than it looks from the outside.
What helps and what makes it worse
A microfiber cloth is useful for visible moisture on the lid, palm rest, and bottom cover. It does not fix the problem. Wiping the surface does nothing for liquid that has already moved under the keyboard membrane, into hinges, or between layered board sections. Those are the places where corrosion keeps working after the laptop appears dry.
Shaking the laptop hard is a mistake. It can push liquid deeper into areas that were still salvageable. Gentle inversion and steady drainage work better than panic movement, and cool air is safer than heat because high heat can drive moisture further into the machine or stress components that are already wet.
If the model has a removable battery, take it out. If the battery is integrated and you cannot access it without force, stop and avoid tearing into glued assemblies blindly. The point is to isolate power and help liquid escape, not to turn a spill into a broken chassis.
For a broader repair workflow and related recovery topics, see the laptop water damage repair resources at this repair tag page.
Safe Drying Methods and Recommended Timeframes
Drying is where impatience ruins a repair. The rice bowl myth survives because it sounds easy, but it does not remove trapped moisture from sealed parts, and it can leave dust or starch in ports and openings. Controlled airflow is the better choice. Repair guidance keeps pointing toward ventilation, cool air, and patience instead of shortcuts.
The drying setup that makes sense
Put the laptop in a dry, ventilated area and let cool air move around it. A fan is better than a heater because it helps evaporation without forcing heat into plastics, adhesives, or battery areas. Keep the machine open if that can be done safely, with liquid-facing areas exposed to air instead of pressed against a desk or cloth.
What you want is steady air movement, not blast drying. Hairdryers and ovens are bad bets because they can push moisture deeper, warp parts, or speed up corrosion in places that were only lightly wetted. That warning shows up often in repair guidance for a reason. Surface dryness can fool you while moisture still sits under keys, under shields, and in board layers [Aeanet repair guide].
Practical rule: if you can still see droplets in seams or under components, it is not dry enough to power on.
How long to wait
The minimum drying window is 24 to 48 hours, and technicians often recommend 48 to 72 hours or longer in humid environments because trapped moisture hangs around after the outside looks fine. Humidity matters because the air is already holding more moisture, so the laptop gives up water more slowly. That is especially true for keyboards, hinges, and layered board stacks that do not dry evenly [Fields Data Recovery guide].
A practical shift in consumer advice has been the move away from the rice bowl toward air-drying and proper inspection. That change happened because the problem is not the visible puddle. It is what remains hidden inside after the spill seems gone.
Hidden Corrosion Damage That Strikes After Drying
A laptop that powers on after drying can still be damaged. That's the trap. Water often leaves behind residue, and residue can become corrosion, intermittent faulting, or a short path that doesn't show up until days or weeks later.
What to look for under the cover
Open the chassis only if you can do it safely, then inspect the motherboard, connectors, and nearby modules under good light. White or green crusty deposits are the obvious warning signs, but even a faint film near a connector can matter if the spill involved more than plain water. iFixit advises removing affected parts and cleaning corrosion deposits with 90%+ isopropyl alcohol, and repair guidance increasingly treats that step as part of the fix, not an optional cleanup [iFixit liquid damage wiki].
Sugary drinks, salt water, and coffee are worse than plain water because they leave conductive residue behind. That residue can keep conducting or corroding even after the laptop feels dry to the touch. A 2023 repair walkthrough also emphasized checking for corrosion before reassembly, which matches what board-level repair technicians watch for every day.
Why “it turned back on” is not the finish line
A machine that boots once after a spill can still fail later from hidden damage. The board may be surviving on borrowed time while corrosion works across solder joints and connectors. That's why a proper inspection goes beyond the keyboard and includes RAM slots, Wi‑Fi modules, and motherboard contact points.
If you're comfortable opening the laptop, clean only what you can identify clearly and only with the right solvent. If you're seeing residue on multiple parts, or the spill was sugary or salty, DIY drying alone usually isn't enough. That's where component-level cleaning becomes the key decision point, because the issue is no longer wetness, it's chemical damage that keeps progressing after the surface looks fine.
Data Recovery Options and Realistic Repair Expectations
When the laptop body may be a write-off, the files still matter more than the shell. Technicians usually start with storage for that reason. Recovery guidance commonly recommends removing the SSD as soon as it can be done safely, then reading it through an external enclosure while the rest of the laptop finishes drying.
Why the drive comes out first
Storage often survives liquid exposure better than the main board. If the laptop will not boot cleanly, pulling the SSD and accessing it externally can save documents, photos, project files, and business records without waiting for a full board repair. That is a different job from trying to bring the entire machine back at once, and it is usually the right call when the data has real value.
The practical rule is simple. If the files matter, remove the storage from the wet machine before you keep testing power. If the laptop matters more than the files and it is an older design with a removable battery, recovery is more straightforward. Modern laptops with integrated batteries and glued assemblies are harder to service and often cost more to restore because disassembly is riskier and liquid spreads in less predictable ways through the tighter layout.
For a closer look at recovery workflows, see this professional hard drive recovery resource.
What a realistic repair estimate should include
A proper assessment does not stop at “it turns on.” It checks the board, storage, RAM, Wi‑Fi module, and display connection path separately, because each part can fail in a different way after liquid exposure. That is where the economics matter. If the board shows corrosion, the battery is integrated, and several components need cleaning or replacement, replacement can make more sense than chasing a revival that will not stay reliable.
Practical rule: data recovery and laptop repair are not the same job, and they should not be priced like the same job.
A good shop should tell you whether the SSD is readable, whether the motherboard needs component-level work, and whether the laptop is worth restoring or replacing. That clarity matters more than a hopeful guess.
When to Call a Professional and What to Expect
DIY makes sense for a small spill of plain water on an older laptop, caught immediately, with a removable battery and no signs of corrosion. Everything else gets riskier fast. If the spill involved coffee, soda, juice, salt water, or any liquid that leaves residue, professional help becomes the safer move because hidden damage rarely stops at the obvious wet spot.
The line between DIY and depot repair
A professional water-damage assessment usually starts with full disassembly, then cleaning, inspection, and selective part testing. That can include component-level diagnostics, corrosion removal, and replacement of parts that fail testing instead of guessing at the whole machine. For complex liquid damage, that approach is more reliable than repeated power-on attempts, which can keep driving faults deeper into the board.
If you're comparing repair providers, read this guide to choosing a notebook repair shop and ask the same questions in person. Ask whether they do in-house depot repair, whether they handle board-level cleaning, whether data recovery is part of the process, and how they handle diagnostics before approving work.
What a good repair shop should tell you
A solid shop should explain whether the damage is limited to removable components or has reached the motherboard. It should also tell you if the SSD can be pulled and read externally before deeper repair starts. If a provider can't separate those two concerns, data and hardware, you probably need a second opinion.
Houston-area users who want direct help with liquid-damaged laptops, data recovery, or board-level repair can bring the machine to We Fix PC Laptop. The team works from an in-house depot, which helps keep diagnosis and repair under one roof, and that matters when corrosion is still active and time is working against the board.
- How to Find the Best Notebook Repair Shop: The 2026 Expert Guide
- Laptop Screen Repair vs. Buying a New Laptop: Which Saves You More Money in 2026?
- The Ultimate Guide to Laptop Repair: Restoring Performance and Data in 2026
- Comprehensive Laptop Screen Repair Guide: 2026 Professional Solutions
- Why Is My Laptop Suddenly Running Slow? 12 Problems a Computer Repair Technician Can Fix
- Dell Laptop Screen Replacement Cost: 2026 Pricing and Repair Guide
- The Ultimate Notebook Screen Repair Checklist: 2026 Expert Guide