.svg)
.svg)
.svg)




How to Clone a Hard Drive to SSD Without Losing Data
Your laptop has become painfully slow, the hard drive chatters during startup, and you've already bought an SSD that should make the machine feel new again. The tempting shortcut is to copy everything across, remove the old drive, and hope Windows starts normally. That's exactly where many migrations fail.
Learning how to clone a hard drive to an SSD isn't mainly about clicking “Clone.” The difficult parts happen before and after the copy: mismatched MBR and GPT partition schemes, a target SSD that can't hold the source data, BitLocker protection that triggers recovery, and USB connections that make a supposedly quick job run for hours. A careful migration preserves your operating system, applications, files, and partitions without forcing a full reinstall, but only if you treat it as a controlled upgrade.
Table of Contents
- Pre-Clone Preparation Checklist
- Understanding the Technical Constraints
- Executing the Clone Process
- Realistic Time Expectations and Performance Factors
- Post-Clone Validation and Boot Testing
- When to Call in Professional Help
Pre-Clone Preparation Checklist
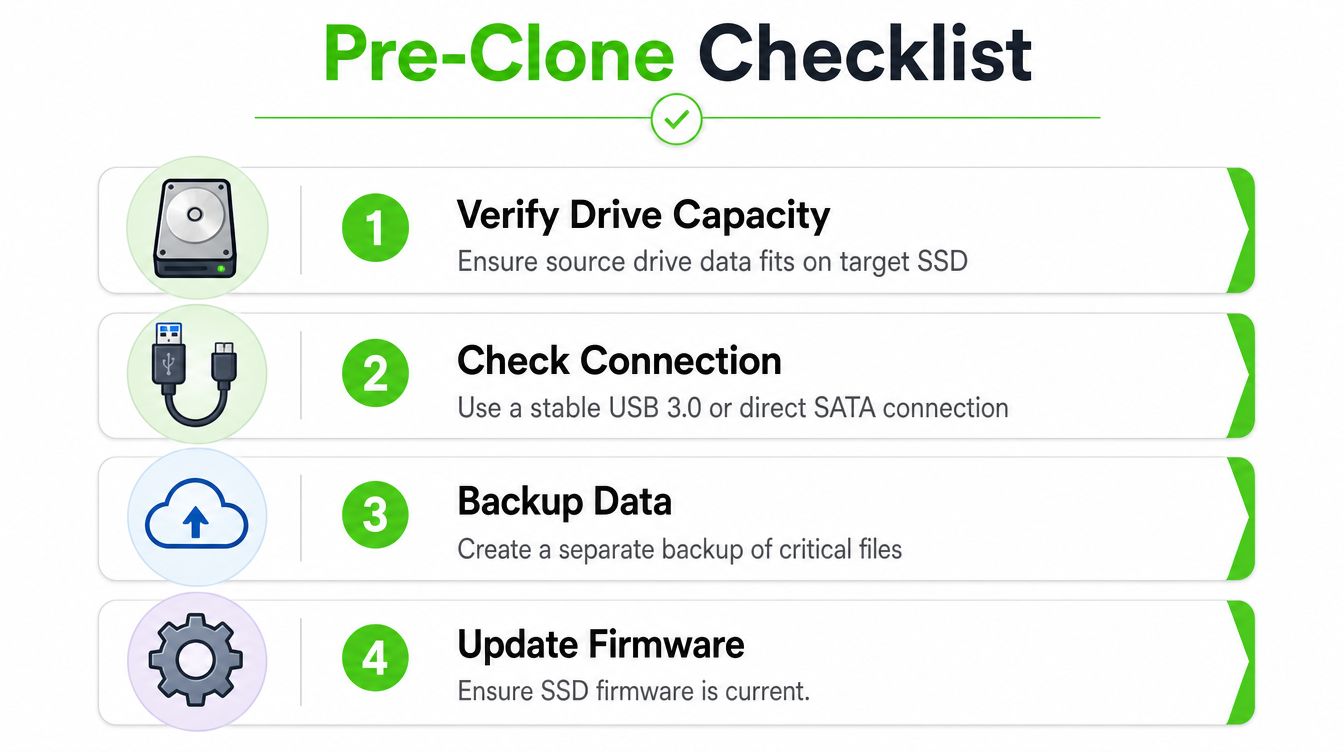
Before opening cloning software, verify the SSD's capacity, the connection method, the source drive's health, and the location of your separate backup. A slow HDD may still contain readable data, but repeated reads can expose a drive that is already failing.
Check used space, not the source HDD's advertised capacity. The SSD's usable capacity must exceed the data stored on the source, along with the partitions Windows needs to boot and recover. A large HDD with modest file usage can fit on a smaller SSD, while a nearly full source may not. HP's recommendation to match MBR or GPT partitioning between drives is also important. Record whether the source uses MBR or GPT before selecting the migration settings.
Check the hardware before the software
Connect both drives at the same time whenever possible. A desktop may provide a spare SATA connection. A laptop commonly requires a USB-to-SATA adapter, drive enclosure, or compatible M.2 slot. Use a stable connection and leave the laptop and adapter undisturbed during the copy. A loose USB connection can stop the clone or produce misleading read errors, especially during a long transfer.
Create a separate backup of irreplaceable documents, photos, browser data, and work files before cloning. A clone is a migration copy; it does not replace an independent backup. If the source HDD shows signs of failure, consider protecting personal data before sending a PC for repair before continuing. Do not use the new SSD as the only location for those files.
Check BitLocker before cloning
Open Windows security settings and check whether the system drive uses BitLocker or device encryption. Confirm that the BitLocker recovery key is available. Then suspend protection according to your Windows configuration before starting the clone. Leaving encryption protection active can cause the copied installation to request recovery credentials during its first boot, even when the files copied correctly.
Use this pre-flight list:
- Capacity: Confirm that the SSD's usable space exceeds the source drive's used space.
- Partition scheme: Identify MBR or GPT and confirm that the migration supports the source layout.
- Connection: Attach both drives through direct SATA, a spare M.2 slot, or a reliable USB adapter.
- Backup: Store irreplaceable files separately from both internal drives.
- Encryption: Save the BitLocker recovery key and suspend protection before cloning.
- Firmware: Check the SSD manufacturer's support tool for available firmware updates before migration.
Understanding the Technical Constraints
A clone isn't always a simple sector-for-sector photocopy. Windows, the partition table, boot mode, encryption layer, and SSD controller all have to agree about what the new drive contains and how the computer should start from it.
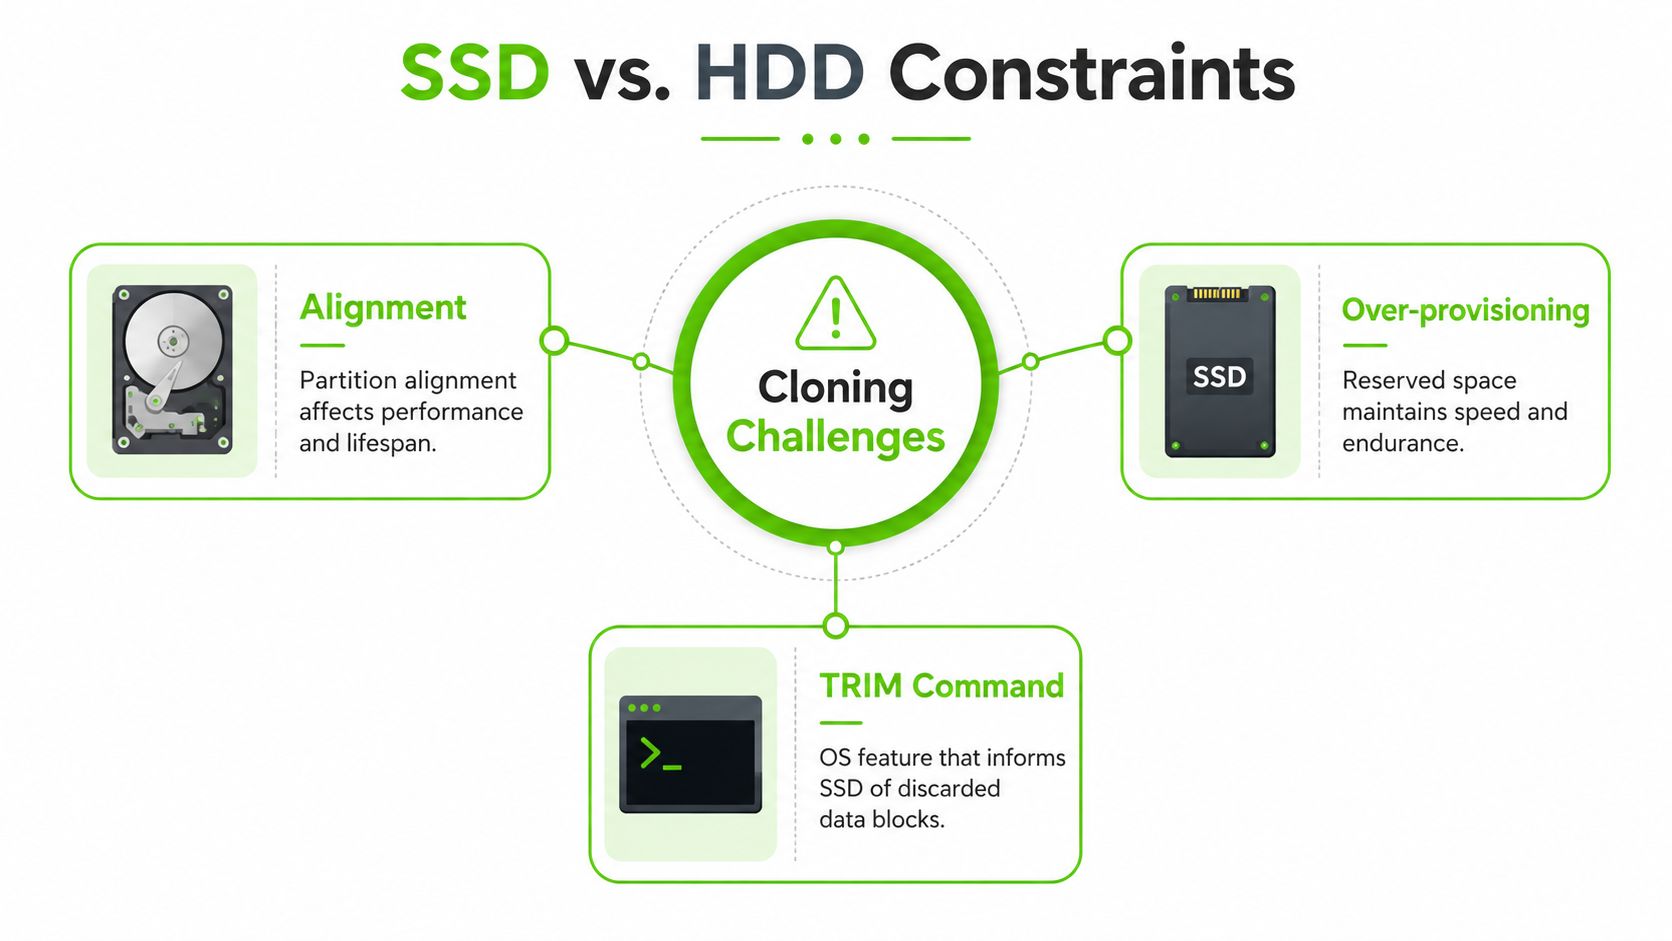
The first constraint is the partition scheme. MBR commonly pairs with legacy BIOS booting, while GPT is associated with modern UEFI installations. If the source is configured for one combination and the replacement SSD is prepared or selected for another, Windows may be present but the firmware won't find a valid boot path. That's why checking the source layout before cloning matters more than choosing a visually simple cloning wizard.
Capacity creates a second boundary. Cloning software can often copy only occupied partitions and resize them, but it still needs enough room for the source data and the system partitions required by Windows. Shrinking a data partition before cloning may be necessary when the target SSD is smaller. Don't delete recovery or boot partitions just because they don't contain personal files. They may be essential to startup or recovery.
Why SSD handling differs from HDD handling
An HDD stores data magnetically and can be overwritten using traditional disk-wiping logic. An SSD manages flash cells through a controller, wear leveling, and internal mapping. Micron's secure erase documentation identifies the ATA SECURITY ERASE PREPARE and SECURITY ERASE UNIT commands for securely erasing a SATA SSD, while HP describes secure erase as returning user-space blocks to a ready-for-new-data state. The Micron secure erase reference explains why an SSD shouldn't be treated like a magnetic disk.
That distinction matters after migration. Don't run repeated overwrite passes on an SSD as though it were an HDD, and don't assume deleting partitions is the same as securely sanitizing the drive. Formal secure erase procedures use controller-level commands, and the kernel's ATA secure erase documentation describes operational checks such as confirming whether a drive is frozen before erasing it.
BitLocker adds another layer. The files may copy correctly, yet the security state can change when Windows sees a different storage device or boot configuration. If you don't suspend protection and keep the recovery key accessible, the first restart can stop at a recovery prompt. If the source drive shows corruption, unusual noises, or repeated read failures, stop cloning and consider data recovery from a failed hard drive before attempting a normal migration.
Practical rule: A successful copy proves that data was transferred. It doesn't prove that firmware, Windows boot files, and BitLocker will accept the SSD as the new system drive.
Executing the Clone Process
Choose software that supports your source and target connection, partition layout, and intended boot mode. Many SSD manufacturers provide migration utilities for their own drives, while tools such as Macrium Reflect, Clonezilla, Acronis, and other disk-copy applications offer different levels of control. The right choice depends on whether you need a straightforward intelligent clone, a rescue-oriented workflow, or detailed partition management.
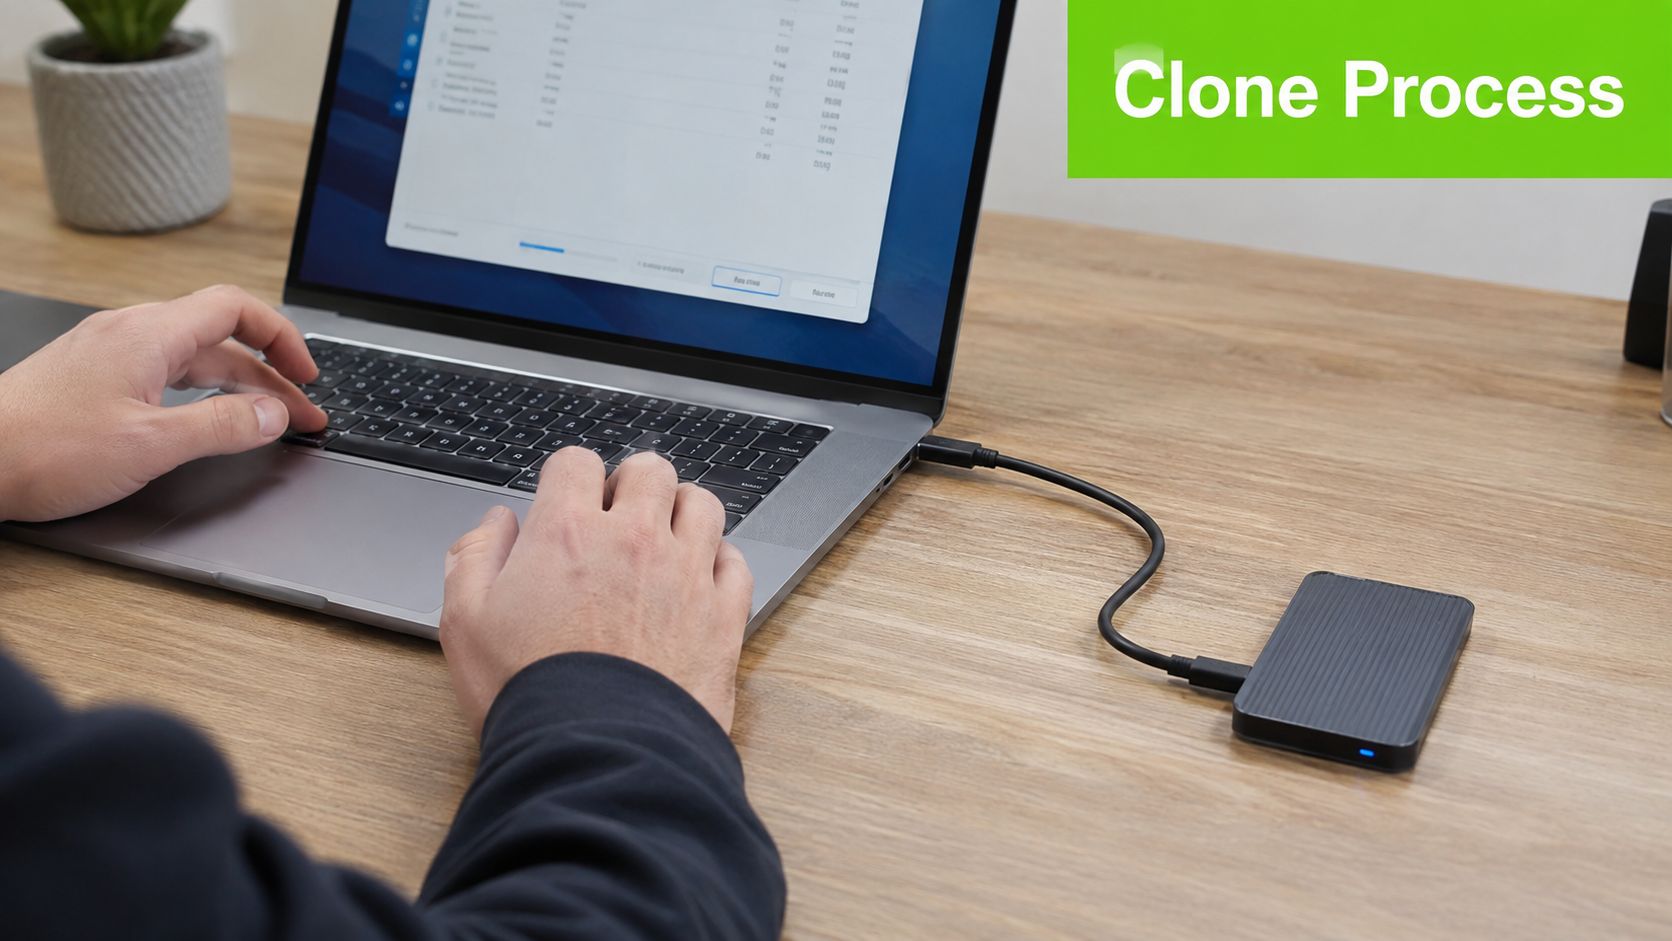
Start by identifying the drives by model and capacity, not just by their position in a list. The source is the existing HDD containing Windows. The destination is the new SSD. Selecting them backward can destroy the original installation, so disconnect unrelated external drives before opening the cloning utility.
Select the copy method carefully
Use an intelligent or filesystem-aware clone for a healthy Windows installation. It copies the partitions and occupied data while allowing the software to resize partitions for the target. Sector-by-sector mode copies every sector, including unused space, and may be appropriate for unusual layouts or forensic-style duplication, but it generally demands more space and can take longer. Don't choose it merely because it sounds more complete.
Review the destination layout before confirming. Preserve the EFI, Microsoft Reserved, Windows, and recovery partitions where present. If the SSD is larger, expand the Windows partition only after the required system partitions have been placed correctly. If the SSD is smaller, reduce the source partition or let the software fit the copied data into the available space.
Begin the operation only after the software displays the correct source and destination. Keep the computer connected to reliable power, close applications that write heavily to disk, and don't force a shutdown if the progress indicator appears to pause briefly. A stalled percentage can reflect a difficult file, slow USB storage, or retries against a damaged sector.
If the tool reports read errors, note the exact message rather than repeatedly restarting the process. A healthy source may need a filesystem check before another attempt. A failing source needs a recovery-first strategy, because cloning software is designed to copy a disk, not repair a mechanically degrading one.
Realistic Time Expectations and Performance Factors
A large clone over USB can occupy most of a workday, especially when the source HDD is nearly full or the enclosure is slow. The duration depends on the data that must be read and written, the source disk's condition, and the connection between both drives. A consumer guide reports typical Windows clone times of about 15 to 45 minutes, while another documented SSD-target clone took around 1 hour and 35 minutes. See AOMEI's documented cloning time guidance for the source context.
USB is practical for an external SSD, but the enclosure and cable can limit throughput. HP's migration guidance gives rough ranges of 30 to 60 minutes for a 250GB HDD over USB 3.0, 1.5 to 3 hours for a 1TB drive, and 3 to 6 or more hours for systems larger than 2TB. The same HP guide to cloning a hard drive in Windows notes that slower enclosures can reduce NVMe transfers to under 40 MiB/s.
| Drive Size | Connection Type | Estimated Time | Notes |
|---|---|---|---|
| 250GB HDD | USB 3.0 | 30 to 60 minutes | Depends on used data and enclosure quality |
| 1TB drive | USB connection | 1.5 to 3 hours | A nearly full drive takes longer |
| 2TB or larger | USB or slower enclosure | 3 to 6 or more hours | A weak enclosure can make the migration an all-day job |
| Typical Windows clone | Varies | 15 to 45 minutes | Reported typical range, not a guarantee |
Use the table for scheduling, not as a promise. A mostly empty drive may finish quickly. A nearly full HDD takes longer, and weak sectors can trigger repeated reads that extend the process. Direct SATA removes one conversion layer, but it cannot compensate for a failing source disk or a large volume of data.
Encryption and partition layout can also affect the result. BitLocker may require recovery-key verification after the hardware change, while a source using MBR may need the firmware and destination configured for legacy boot rather than UEFI. Confirm those details before assuming slow progress indicates a failed clone.
Start a large migration when the computer can remain undisturbed. After the upgrade, address broader Windows slowdowns with practical maintenance such as ways to improve Windows performance, rather than expecting the SSD to correct every software problem.
Post-Clone Validation and Boot Testing
A clone can report success while the computer still boots from the original HDD. Keep that drive untouched until the SSD starts Windows independently, the desktop loads normally, and your important files and applications pass inspection.
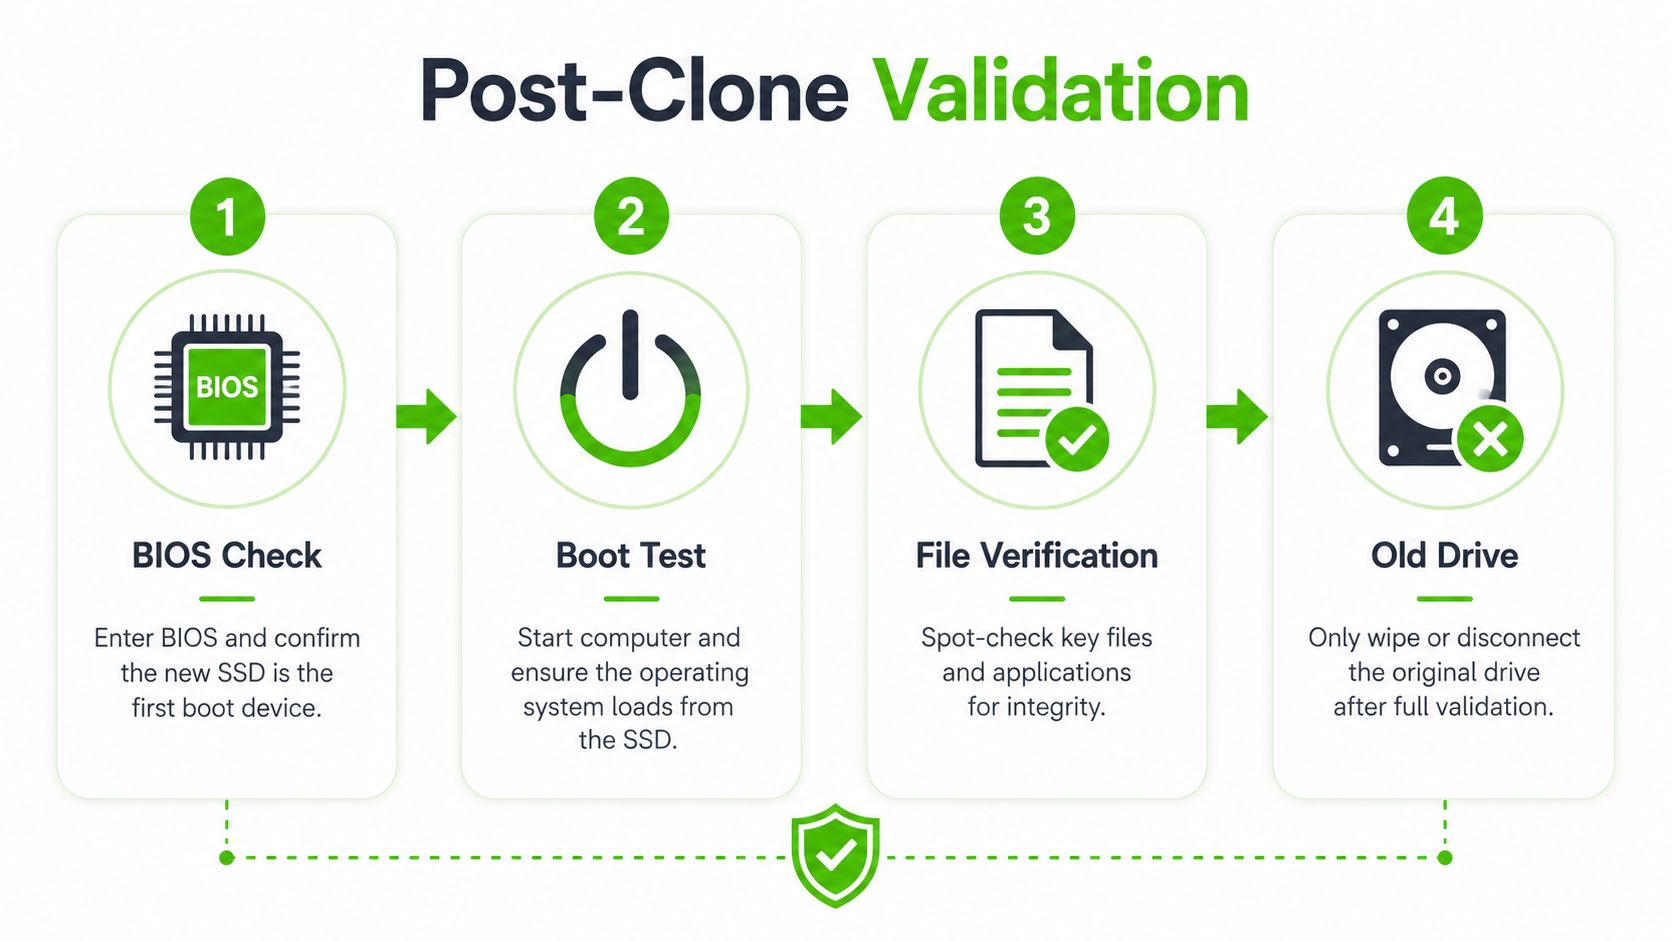
Shut the computer down completely after cloning. Disconnect the original HDD for the first boot test if the hardware allows it. With both drives connected, firmware can start Windows from the old disk and make an incomplete migration look successful. If disconnecting the HDD is impractical, open BIOS or UEFI and set the new SSD as the first boot device, following the earlier cloning guidance.
Verify startup and Windows access
On the first SSD boot, confirm that Windows reaches the desktop without a recovery loop. A recovery prompt indicates a security-state change, not necessarily a failed clone. Use the recovery key recorded during preparation, then check BitLocker status and apply the suspend or resume step described earlier.
After Windows loads, check these items:
- Drive identity: Confirm that the active system disk is the SSD rather than the old HDD.
- Partition layout: Open Disk Management and verify the expected system, Windows, and recovery partitions.
- Files: Open representative documents, photos, and folders stored in different locations.
- Applications: Launch the programs you depend on, especially those using local databases or license checks.
- Storage capacity: Confirm that Windows shows the intended free space on the SSD.
- Boot behavior: Restart the computer more than once and verify consistent startup.
A missing drive letter can result from Windows recognizing a partition without assigning it a letter. Recovery and system partitions commonly behave this way. Do not format an unfamiliar partition merely to make it appear in File Explorer. Identify its role in Disk Management first.
Activation errors may follow a significant hardware change. Handle an activation prompt through Windows account and license troubleshooting, and do not delete partitions to force a repair.
Once the SSD passes these checks, keep the old HDD offline while you confirm that the new installation remains stable during normal work. Repurpose or securely erase the original drive only after the SSD has proven reliable and your backup is available.
When to Call in Professional Help
DIY cloning makes sense when the HDD is healthy, the partition layout is simple, and you have a verified backup. It becomes a poor gamble when the source drive is making unusual noises, disappearing from Windows, reporting corrupted files, or producing repeated read errors. Those symptoms point to a source-disk problem, not a software-selection problem.
A failing HDD should be handled as a data recovery job first. Each additional scan or clone attempt can increase stress on a damaged device, and a normal migration tool may stop at the exact sectors containing the files you need. A technician can assess the drive condition, create a safer recovery image, and then migrate the recovered installation or files to the SSD.
Professional help is also sensible for systems with complex boot arrangements, multiple operating systems, unusual recovery partitions, domain-managed encryption, or business applications that depend on specific services. BitLocker recovery, MBR to GPT conversion, and boot repair can each be manageable, but combining them increases the chance of locking yourself out or wiping the only usable copy.
For Houston residents, ask a repair provider whether the work is performed in-house, how the original drive will be protected, whether you'll receive a clear diagnostic assessment, and when the old drive may be erased. We Fix PC Laptop provides in-house diagnostics, SSD installation, data migration, drive cloning, and data recovery support for Windows and Mac systems, with service for home users and businesses. The company's Houston location is at 1301 Waugh Dr., Suite 200, and same-day turnaround is available for some repairs when parts are in stock.
If your HDD is slow, encrypted, nearly full, or refusing to boot, We Fix PC Laptop can assess the source drive, prepare the SSD, and verify the migration before your original data is erased. Visit We Fix PC Laptop to discuss an SSD upgrade, cloning job, or data recovery plan with a Houston repair team.