.svg)
.svg)
.svg)




Replacing USB Ports: Complete Laptop Repair Guide
A laptop arrives at the repair counter with a USB-C cable that only works when it's held at one angle. The owner says the charger drops out, a flash drive appears only occasionally, and the docking station disconnects whenever the machine moves. Their first question is usually simple: “Can you replace the USB port?”
Sometimes the answer is yes. Just as often, the port is dirty, the cable is damaged, the contacts are bent, or the fault sits in the laptop's charging and USB controller. Replacing hardware before confirming the cause can turn a quick clean-up into unnecessary board work.
USB-C has also changed the repair decision. The connector was finalized in 2014, and adoption moved rapidly across major device categories. An Omdia industry report expected USB-C penetration to reach 95.8% in notebook PCs and 59.6% in smartphones, while tracking adoption across 32 product categories from 2020 to 2027 in its industry outlook (Omdia USB-C adoption report). A modern laptop may use a replaceable daughterboard or even a screw-mounted receptacle, while an older design may solder the port directly to the motherboard.
Practical cost rule: Cleaning and testing are low-risk diagnostic work. A daughterboard swap is a contained parts replacement. Direct motherboard soldering is a board-level repair, and it carries a different level of risk.
Table of Contents
- When a USB Port Really Needs Replacing
- Diagnosing the Fault Before Touching the Hardware
- Comparing the Three Repair Paths
- Tools and Safety Gear You Need
- Walking Through a USB-C Daughterboard Replacement
- What Microsoldering Actually Involves
- When Repair Stops Making Sense
When a USB Port Really Needs Replacing
A laptop reaches the repair bench with a USB-C connector that moves in its chassis. Charging cuts out when the desk shifts, and a flash drive connects only after several attempts. Those symptoms justify inspection, not immediate motherboard heating.
The fault must be tied to the connector before parts are ordered. Lint can stop the plug from seating fully. A worn cable can produce the same intermittent behavior as a loose socket, while a dock may disconnect because of its power supply, cable, firmware, or internal controller.
A loose-feeling port can have broken anchor points, damaged plastic, or debris packed behind the plug. Charging at one angle may indicate bent contacts, though a distorted cable plug can create the same result. The physical symptom narrows the search, but it does not identify the failed part by itself.
The decision path a repair shop follows
A practical repair order is:
- Confirm the symptom with more than one known-good cable and device.
- Inspect the connector for debris, bent contacts, corrosion, or cracked plastic.
- Reset the software side, including device detection and power-management settings.
- Identify the hardware type, such as a modular daughterboard, screw-mounted port, or soldered receptacle.
- Choose the least invasive repair that restores reliable function.
- Escalate to board-level work only after proving the receptacle is defective and confirming that no simpler assembly is available.
The distinction affects both risk and cost. A daughterboard or screw-mounted port can often be replaced as a contained assembly. A receptacle soldered directly to the motherboard requires board-level work, and damage to pads or nearby components can turn a port repair into a larger failure.
Replacing the connector will not correct a failed USB controller, charging circuit, liquid-damaged board, or bad cable. USB-C charging negotiation can also fail while the socket remains clean and mechanically sound, so the charging path deserves separate testing.
USB-C has become the common direction for newer laptops and accessories, replacing older USB-A and Micro-USB-era designs across many devices. European common-charger rules required USB-C on covered small electronic devices sold in the bloc in 2024, and industry reporting has described USB-C as the dominant connector on newer smartphones (USB-C charging statistics and regulation summary).
That transition makes the exact model important. The correct replacement may be a USB-C-compatible daughterboard, a screw-mounted receptacle, or a board-level connector with matching power and data circuitry. Repair makes sense when the part is identifiable, accessible, and cheaper to replace than the surrounding board.
Diagnosing the Fault Before Touching the Hardware
Begin with tests that cost nothing and pose no risk to the motherboard. Shut the laptop down normally, disconnect unnecessary accessories, then test the suspect port with a known-good cable and a device that works elsewhere. Repeat the test with another cable. A worn cable plug can produce the same symptoms as a damaged laptop port.
Use several devices with different demands, such as a USB flash drive, a wired mouse, and the original charger if the port supports charging. If one accessory fails while the others work, investigate compatibility, cable quality, power requirements, or the accessory before condemning the laptop port. Record whether the failure affects charging, data, or both.
Inspect before you clean
Use a bright light and look directly into the receptacle. Lint packed against the rear can keep the plug from seating fully. Look for bent contacts, a cracked tongue, corrosion, or a connector shell that moves separately from the chassis. A loose port may indicate damaged anchor points or lint compaction. Angle-dependent charging may signal bent contacts or a worn cable plug.
Avoid aggressive probing with metal tools. USB-C contacts sit close together, so forcing debris inward can bend them or scratch the socket. A nonconductive inspection pick and careful cleaning are safer. Disconnect the battery before opening the machine or cleaning inside it.
Run software checks after the physical inspection:
- Device Manager rescan: In Windows, rescan for hardware changes and check whether the affected USB controller reports an error.
- Driver reset: Remove the affected USB device or controller entry only when you understand what Windows will reinstall, then reboot.
- Power cycle: Shut down completely, disconnect the charger, wait briefly, and start the laptop again.
- BIOS or firmware check: A failure outside Windows points away from software. If the port works in firmware but fails in Windows, examine the operating system or driver layer.
- Liquid-damage review: A spill, condensation, or unexplained corrosion changes the repair path. Follow this water-damaged laptop guide before repeatedly applying power.
What the wiggle test can and can't tell you
Connect a device and move the plug a small amount. If the connection cuts in and out in sync with that movement, the fault is probably mechanical. The test cannot identify the failed part by itself. The receptacle, cable plug, solder joints, or motherboard pads may each produce the same result.
A port that feels solid yet detects nothing calls for controller, power-circuit, cable, and firmware checks before a replacement socket is ordered. USB-C systems may also use screw-mounted receptacles or separate daughterboards, reflecting a broader move toward serviceable designs. Confirm the machine's construction and test the electrical path first. Socket replacement addresses physical connector damage only. A controller-level failure requires board diagnosis, and a damaged motherboard may make replacement uneconomical.
Comparing the Three Repair Paths
Once the connector itself is confirmed as the problem, there are three practical repair paths. They aren't interchangeable, and the laptop's construction usually determines which one makes sense.
Cleaning or contact correction is the least invasive option. It applies when debris prevents full insertion or a contact is slightly displaced without broken plastic, corrosion, or torn board connections. Cleaning can restore normal operation, but it won't repair a cracked receptacle or a connector that has pulled away from its solder joints.
Daughterboard replacement is usually the cleanest solution when the laptop has a separate USB or charging board. The technician removes the bottom cover, disconnects the battery and board cables, replaces the model-matched module, and tests the system. Repair guidance identifies daughterboard swaps as the highest-success option when available, with lower risk and faster turnaround than direct microsoldering (USB-C charging-port replacement guide).
Direct motherboard replacement of the port is the most demanding path. The original receptacle must be desoldered without lifting pads or damaging nearby components, and the replacement must make reliable contact across fine signal pins, shield tabs, and anchor legs. This is not a sensible beginner project just because the replacement port itself is inexpensive.
Repair Path Comparison at a Glance
| Repair Path | Approximate Cost | Skill Level | Typical Success |
|---|---|---|---|
| Cleaning or contact correction | Usually the lowest-cost option | Basic inspection and careful cleaning | Good when debris is the actual cause |
| Daughterboard swap | Depends on the model-matched board | Intermediate disassembly | Usually the most predictable hardware repair |
| Board-level USB-C replacement | Labor-intensive and model-dependent | Microsoldering and board diagnosis | Highly dependent on pad and trace condition |
The table's cost column is intentionally qualitative. Parts availability, laptop construction, damage severity, and technician time vary widely, and a cheap port does not make the surrounding repair cheap.
A daughterboard isn't automatically available just because the laptop has USB-C. Some machines mount the port directly to the motherboard, and some use a board that combines charging, display output, audio, or other functions. Confirm the part number before opening the machine or buying a listing that only appears compatible.
Tools and Safety Gear You Need
A port repair starts with the right tools for the laptop's construction. A modular USB-C daughterboard needs careful disassembly. A motherboard-mounted receptacle requires controlled heat and magnification. Using the wrong bit, pry tool, or heat setting can damage plastic, strip screws, lift pads, or tear a connector.
For inspection and modular replacement, prepare:
- Precision screwdrivers: Use the correct Phillips, Torx, or model-specific bit.
- Plastic spudgers: Separate clips and lift connectors without shorting exposed contacts.
- Fine tweezers: Handle cable tabs, shielding, and small screws.
- Bright inspection light: USB-C sockets can hide debris inside a narrow cavity.
- Nonconductive inspection pick: Remove compacted lint without scraping contacts.
- Isopropyl alcohol: Apply suitable high-purity electronics cleaning alcohol sparingly, then let the board dry fully.
- Anti-static wrist strap: Connect it correctly to a suitable grounded point before handling the motherboard.
Cleaning restores normal operation when debris is the sole cause. It cannot repair a cracked receptacle or a connector pulled away from its solder joints.
If the laptop uses a soldered port, the equipment list changes. You need a temperature-controlled soldering station, a hot-air rework station with controlled airflow, flux, solder wick, suitable magnification, board support, and protective high-temperature tape. A cheap iron alone cannot distribute heat evenly through the connector's shield tabs and anchor legs. Pulling a cool port from the board can lift pads and turn a port replacement into trace repair.
Battery safety comes first
Modern laptops commonly use internal batteries. Shut the computer down, unplug the charger, remove the bottom cover carefully, and disconnect the battery before touching the motherboard or daughterboard. Stop work if the battery is swollen. Never puncture the battery pouch or place tools across exposed power contacts.
Keep screws organized by location. Laptop screws vary in length, and a long screw in the wrong hole can damage the board or enclosure. Photograph cable routing before disconnecting anything. Release the locking tab or use the provided pull handle instead of pulling a ribbon cable by its cable.
For most owners, a screw-mounted port or model-matched daughterboard remains a reasonable repair candidate. A soldered port belongs in a shop once the work requires controlled heat, magnification, and board-level diagnosis. Tool ownership alone does not provide those skills, and recognizing damaged pads or traces before adding heat matters more than having a large kit.
Walking Through a USB-C Daughterboard Replacement
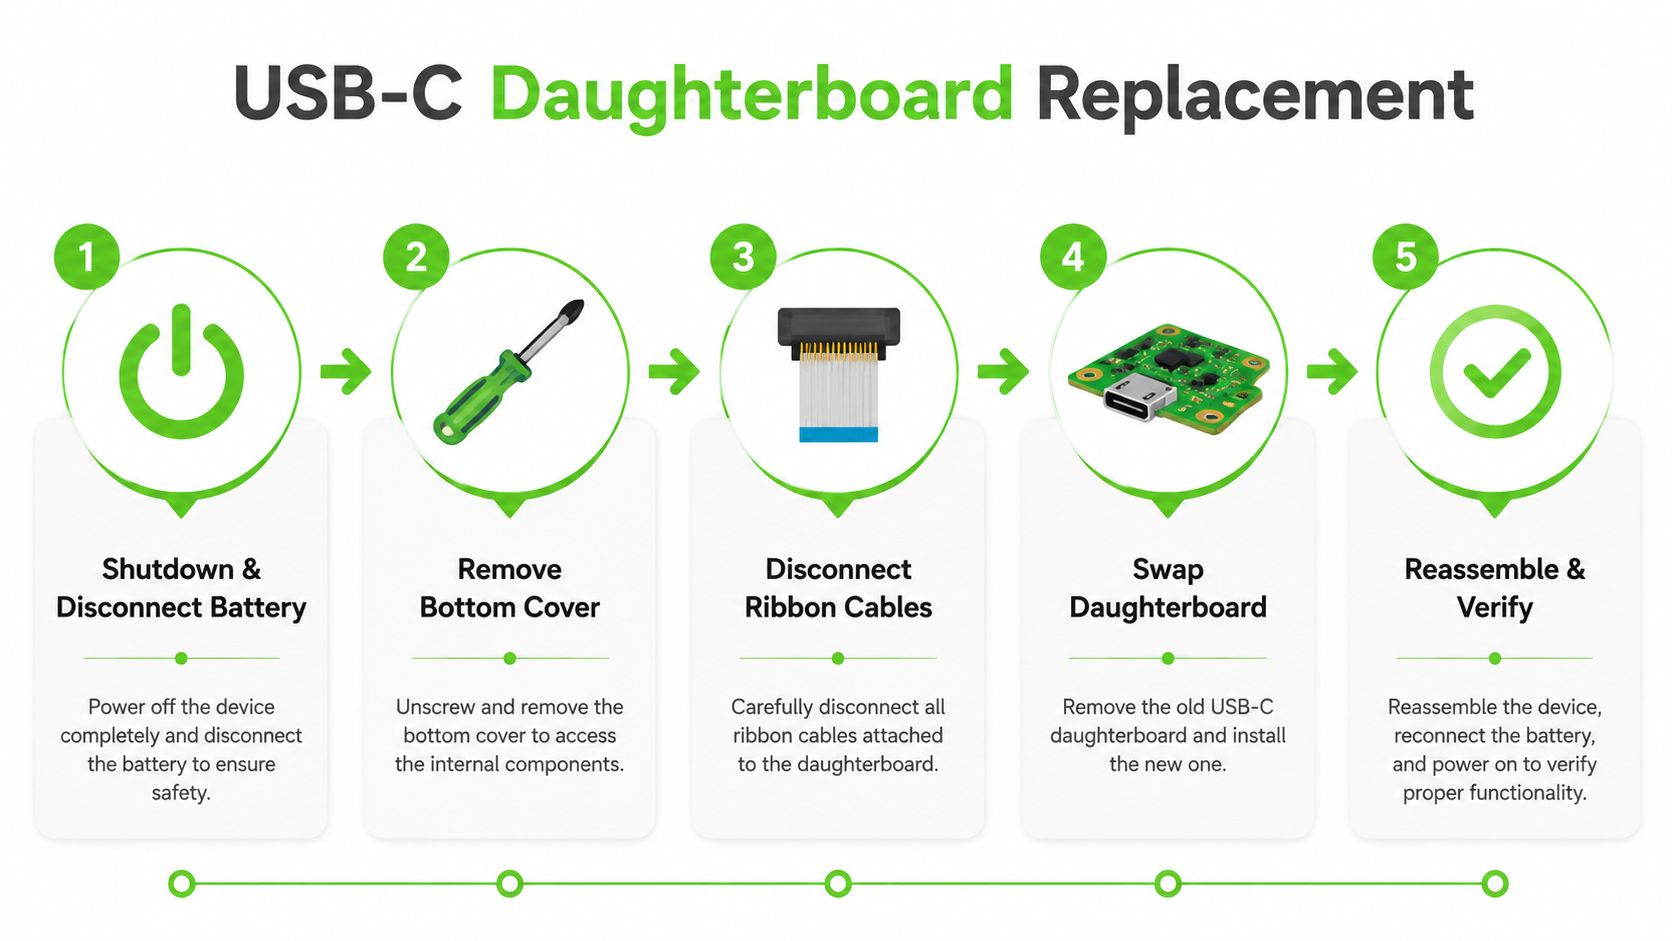
Consider a modern business laptop with a USB-C receptacle mounted on a small side daughterboard. The replacement looks straightforward, but the work succeeds or fails on cable handling and reassembly discipline.
Begin with a complete shutdown, not sleep mode. Unplug the charger, hold the power button only if the manufacturer's service procedure calls for it, and remove the bottom cover using the correct bit. Once inside, disconnect the internal battery before touching the daughterboard cable.
The swap itself
The technician identifies the board by its connector, mounting screws, and printed part markings. Before disconnecting anything, take a photograph that shows cable orientation and routing. Ribbon cables often use tiny locking flaps, and prying the cable upward instead of releasing the flap can tear the cable or break the socket.
Disconnect the daughterboard cable, remove the board's retaining screws, and lift the module without dragging it across the chassis. Compare the replacement with the original. Check the connector position, mounting holes, shielding, board markings, and cable interface before installing it.
The most common first-timer mistakes happen during this quiet part of the job:
- Ripped ribbon cables: Pulling from the flexible section instead of the reinforced tab can destroy the cable.
- Misplaced screws: A screw returned to the wrong hole can interfere with the board or enclosure.
- Unseated connectors: A cable that looks inserted may not be locked under its connector flap.
- Forgotten battery connection: The laptop won't behave normally if the battery remains disconnected during testing.
- Pinched cables: A cable routed under the cover edge can be crushed when the screws are tightened.
Reconnect the replacement board, reinstall the battery, and loosely position the bottom cover before the first test if the design permits safe testing. Verify charging, USB data, external display behavior if the port supports it, and docking operation. Test several known-good devices rather than relying on one flash drive.
A useful follow-up resource is the USB-C port repair tag, particularly when the model doesn't use a clearly modular assembly.
Once every function works, shut down again, disconnect the battery if the manufacturer's procedure requires it for final closure, route the cables exactly as photographed, and tighten screws without over-torquing them. A successful daughterboard replacement is controlled disassembly, not force.
What Microsoldering Actually Involves
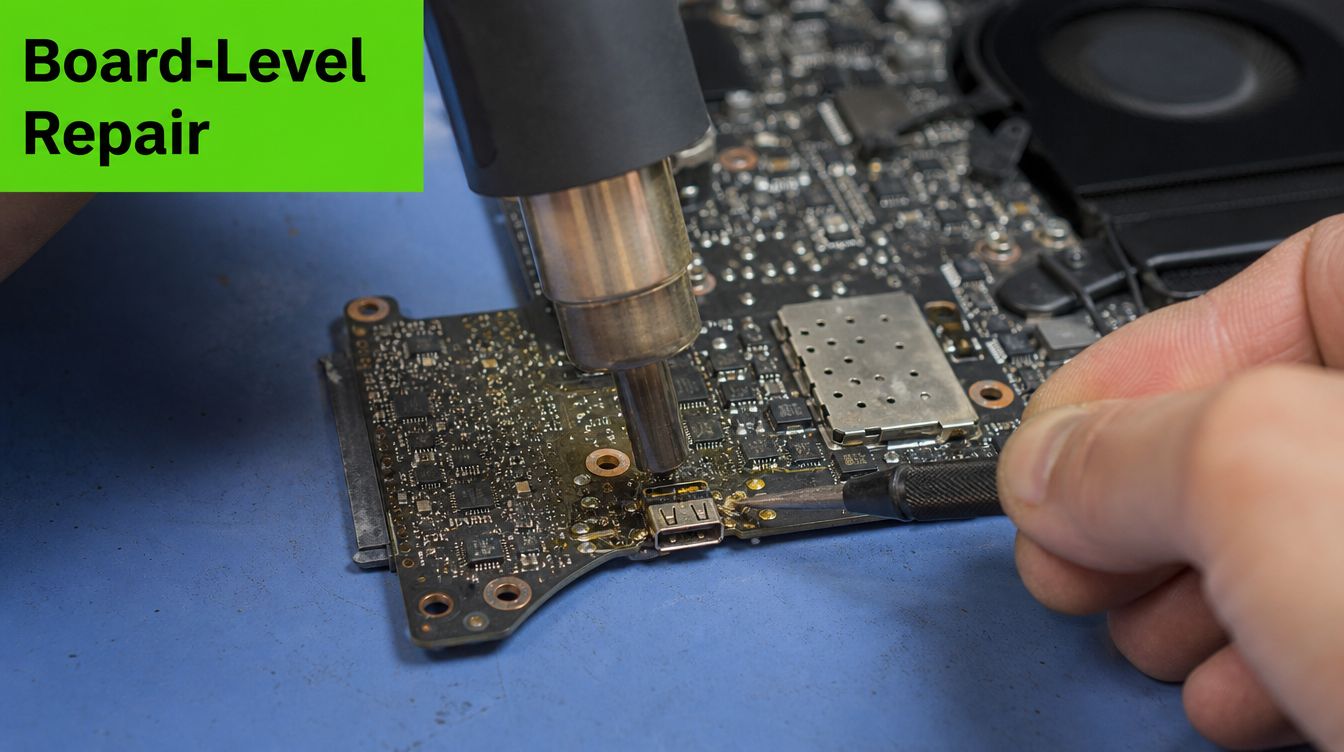
A soldered USB-C replacement starts with board access and diagnosis, not with the hot-air station. The technician must identify the port footprint, inspect nearby components, confirm that the board pads and traces are repairable, and protect heat-sensitive parts around the connector.
The usual process involves preheating the board, applying flux, and using controlled hot air to soften the solder across the signal pins, shield tabs, and mechanical anchor legs. The port must come free without levering against the board. If the technician pulls before all joints are molten, the connector can take copper pads or traces with it.
Why the old port often causes the real damage
USB-C connectors combine fine-pitch electrical contacts with large metal anchor points. The anchors absorb physical stress, but repeated cable movement, drops, or impact can fracture solder joints and weaken the copper underneath. Heat alone won't restore a lifted pad, and adding solder over a broken trace won't create a dependable connection unless the technician rebuilds the circuit path.
The principal failure modes are familiar to board technicians:
- Pad lift: Excess heat or mechanical force separates a copper pad from the board.
- Trace damage: A torn connection interrupts a USB, charging, or display signal.
- Incomplete reflow: Shield tabs or anchor legs don't fully bond, leaving the port mechanically weak.
- Nearby component movement: Hot air can displace tiny resistors, capacitors, or protection components.
- Contamination: Excess flux or debris can complicate inspection and leave unreliable joints.
A replacement port can look perfect and still fail under load if one signal pin is bridged, one anchor is floating, or one trace has been damaged. USB-C also supports multiple functions, so a connector may charge while data or display output remains defective.
That's why casual DIY repair should stop at inspection unless the person already has board-level experience, magnification, controlled rework equipment, and a donor-board recovery plan. A shop should be able to explain whether the port is motherboard-mounted, whether pads are intact, and whether the repair will include post-repair testing for charging, data, and display functions.
When Repair Stops Making Sense
A dead USB port can be a sensible repair on one laptop and wasted money on another. A newer machine with a modular daughterboard may need only a contained part swap. An older laptop with a soldered connector, worn hinges, a weak battery, damaged charging circuitry, and aging I/O may turn the same job into a costly delay before the next failure.
Assess whether the proposed fix is a short-term workaround or a lasting solution. A powered dock or hub can keep the laptop usable while you source the correct part or decide whether to proceed. A powered dock or hub cannot repair the damaged receptacle and provides no benefit if the USB controller or charging circuit has already failed. It can reduce downtime while the repair decision remains open.
The quote should cover more than the replacement connector. Ask whether the technician is pricing cleaning, a daughterboard, a soldered port, or motherboard work. Confirm whether the port carries charging, data, display output, or several of those functions, then ask which functions will be tested afterward. For broader charging-port context, review this guide to laptop charger port repair cost.
A practical decision rule
Repair is usually sensible when:
- The laptop still meets your needs.
- The fault is isolated to a modular daughterboard.
- The correct replacement part is available.
- The motherboard shows no liquid damage or widespread corrosion.
- The repair restores functions you use.
A dock or hub is a reasonable stopgap when the laptop remains dependable, the damaged port is not needed for charging, and your work can use another connection. Do not use one to mask a loose charging port that could arc, overheat, or disconnect repeatedly. Have the receptacle inspected instead of forcing the cable to stay in position.
Replacement becomes more attractive when the machine has several unrelated faults, the connector is soldered into a damaged motherboard, or the job requires extensive trace reconstruction. The calculation also changes when one failed connector reflects broader wear. Unreliable storage, a weak battery, damaged hinges, or recurring thermal problems can make invasive board work difficult to justify.
Serviceability is changing
Repair options depend increasingly on how the laptop was designed. Dell's newer Pro models introduced screw-mounted USB-C ports, making replacement easier than soldered service work in the right design (The Verge coverage of Dell's screw-mounted USB-C ports). Other laptops place the connector on a daughterboard, separating it from the main motherboard. That layout limits the repair area and reduces board-level risk. Older machines still commonly require fine-pitch desoldering and inspection of the surrounding board.
The broader USB-C transition also affects whether an older port is worth preserving. A modern replacement device may provide wider charger, dock, and accessory compatibility, while an older laptop may require adapters and workarounds. USB-C is becoming the standard connection across newer products, although compatibility still depends on the laptop's charging, data, and display implementation.
The technician's decision is direct: diagnose the fault first, use a hub only as a controlled workaround, choose a daughterboard when the laptop supports one, and leave motherboard soldering to a qualified repair shop. If the machine shows several signs of age, spend the repair money only when the rest of the laptop still earns that investment.
We Fix PC Laptop provides in-house laptop diagnostics, charging-port repairs, motherboard-level service, and parts-based repairs for Windows laptops and Mac systems. If your USB-C port is loose, intermittent, or no longer charges reliably, visit We Fix PC Laptop for a diagnosis and a clear choice between cleaning, modular replacement, board repair, or replacement planning.